Heel & foot / READ
Plantar Fasciitis Exercises: A Guide to Heel Raises
How I introduce heel raises for plantar fasciopathy, adapt them to the person in front of me and use the Rathleff loading schedule without confusing effort with pain.
Why use heel raises for plantar fasciitis?
When I prescribe rehabilitation, I want the exercise to be repeatable, manageable and capable of progressing. Simply giving someone the hardest version on day one does not achieve that.
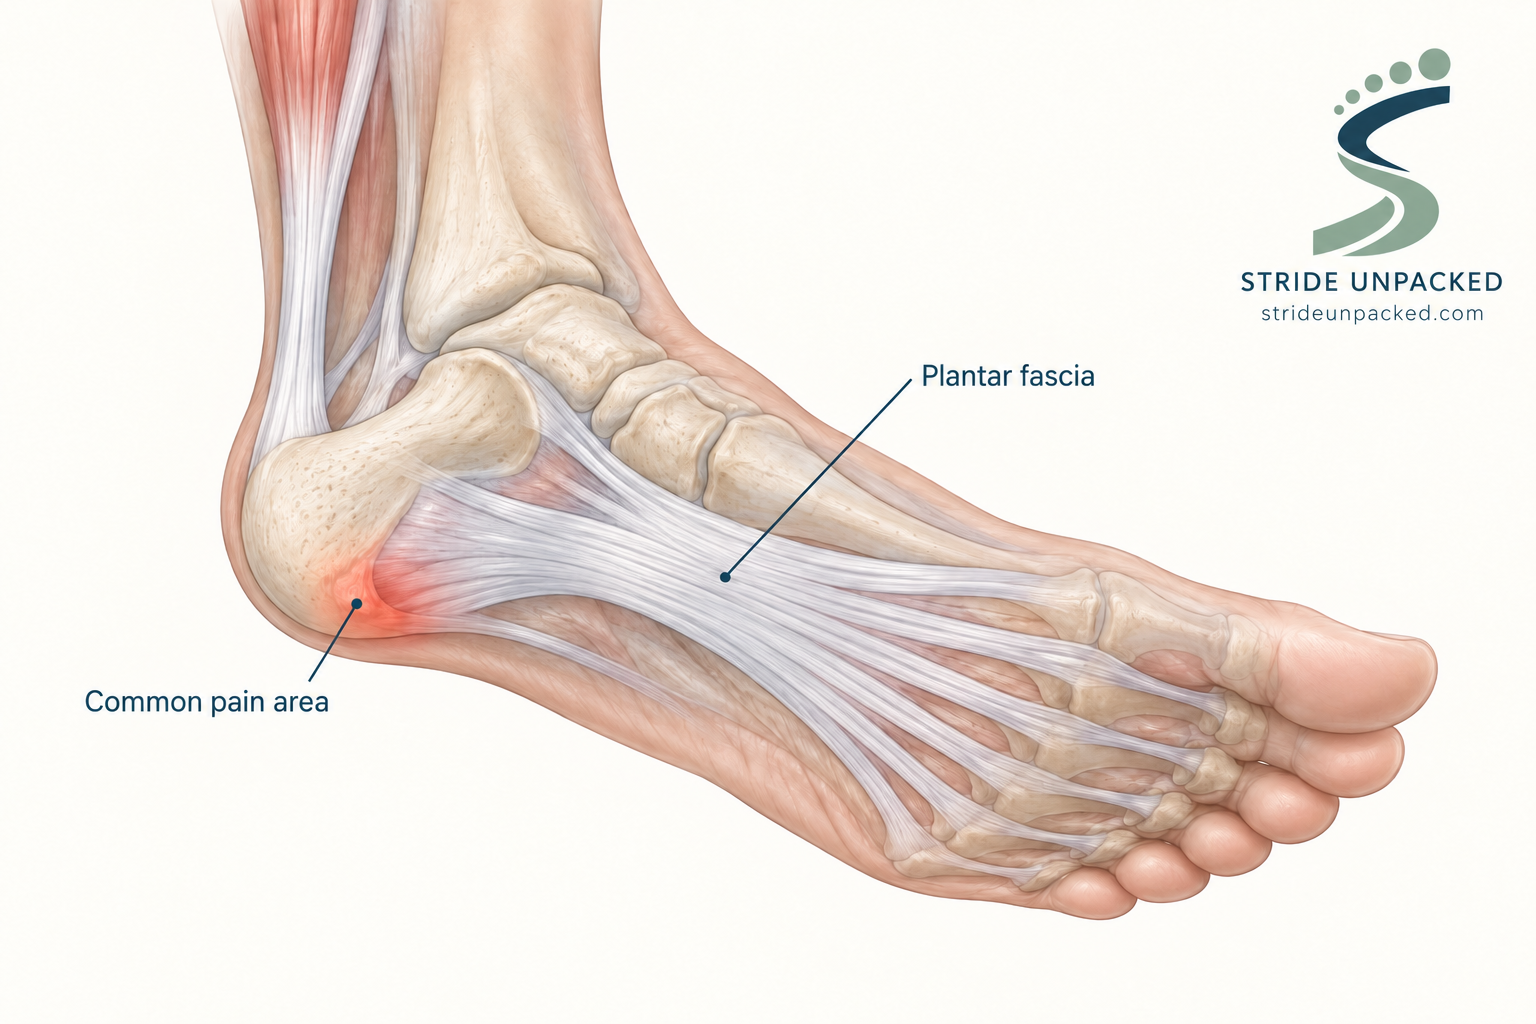
For plantar fasciopathy, commonly called plantar fasciitis, heel raises are one way of working towards greater tolerance of load. They are part of a rehabilitation plan, rather than a guaranteed cure or a test that confirms your diagnosis.
In a small randomised trial involving 48 people, Rathleff and colleagues compared high-load strengthening with plantar-fascia-specific stretching. Both groups also received shoe inserts and information. The strengthening group had better foot-pain-and-function scores at three months, but there was no significant difference between groups at six or twelve months. [1]
That makes loading a useful option to discuss, not proof that everyone needs the same exercise or that stretching has no place.
Where do I start in clinic?
Before prescribing an exercise, I assess the person and their symptoms. This is how I explore a suitable starting point; it is not a requirement to complete every stage in your first session.
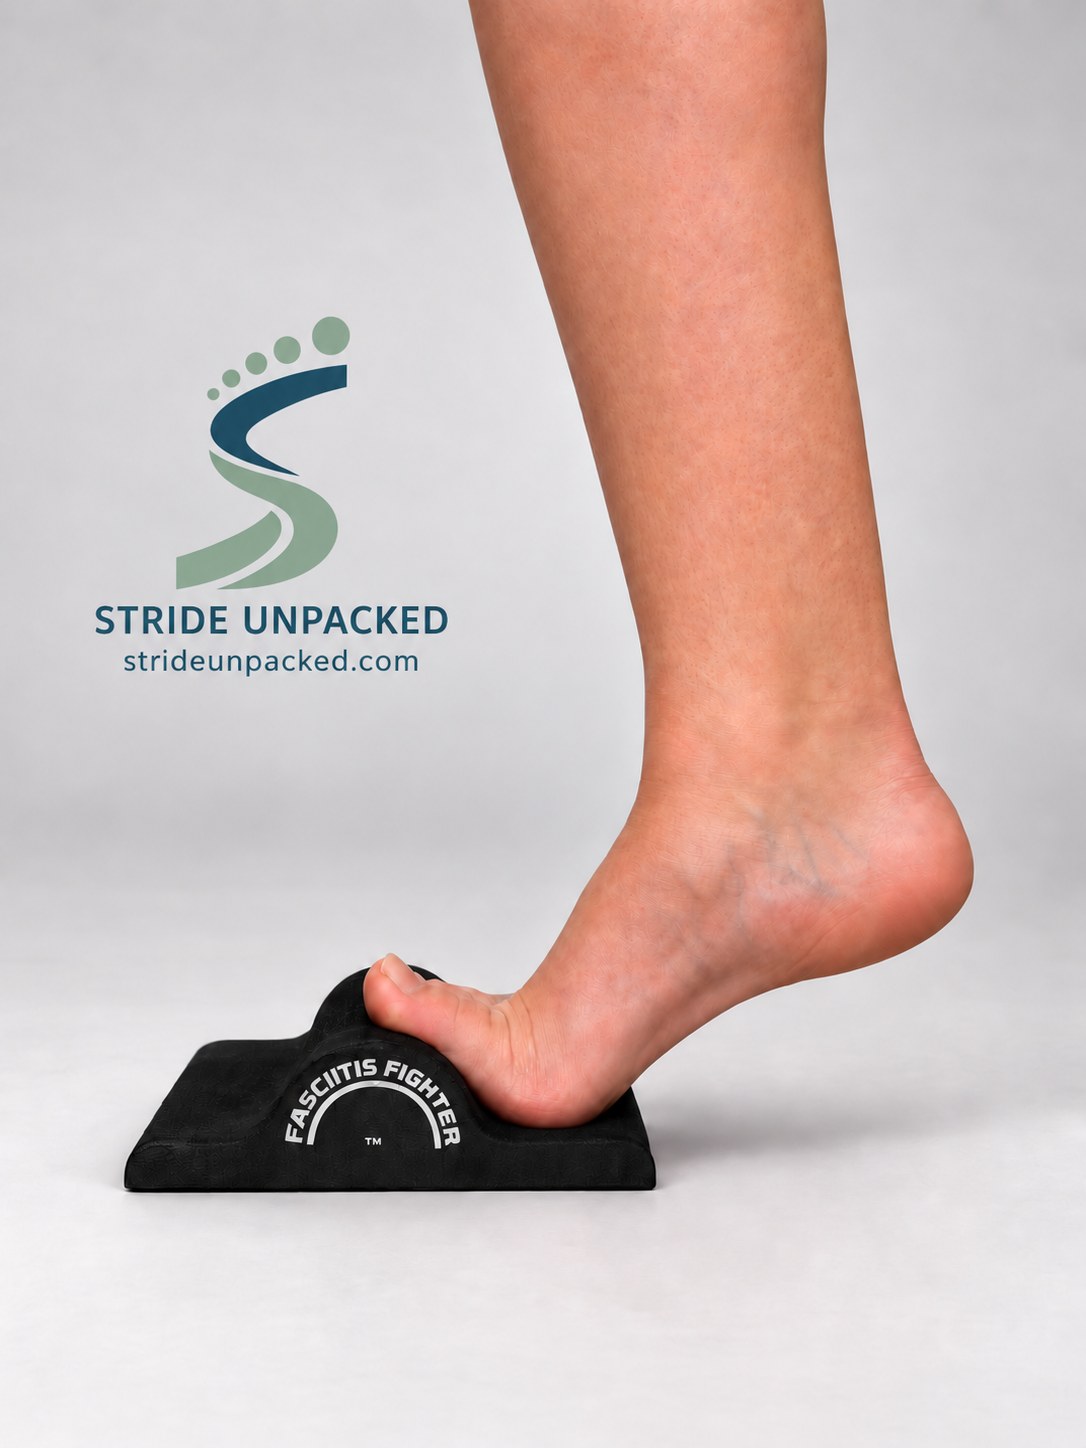
I start with a supported, two-legged heel raise on the floor. If that is manageable, I assess a single-legged version. Only then do I consider adding a rolled towel or a suitable device beneath the toes, returning to two legs first and progressing to one leg if tolerated.
For support, use something fixed and sturdy, such as a kitchen worktop. A support that slides or tips is unsuitable.
The floor-based progression described here is my clinical adaptation. It should not be confused with reproducing every detail of the original research exercise.
How do I perform the movement?
In clinic, I usually assess this barefoot so I can see the movement and position the towel. This is a controlled exercise setup, rather than advice to walk barefoot throughout the day.
- Hold the support and begin with your weight shared between both feet.
- Raise your heels slowly, keeping the movement controlled.
- Pause at the top, then lower slowly without bouncing.
- When a towel is introduced, let your toes rest over it rather than deliberately gripping or pressing down into it.
The towel height should suit your foot and comfortable toe movement. Do not force a stiff or painful big-toe joint into an uncomfortable position.
If single-legged work becomes too demanding, I may return the other foot to the floor to share the load. That is an adjustment, not a reason to keep chasing repetitions when pain is increasing or technique has deteriorated.
If standing exercise is not manageable, I may use seated heel raises as an easier starting point. These can later be progressed with suitable resistance, but they are not equivalent to the high-load exercise studied by Rathleff.
What is the Rathleff schedule?
The published programme used single-legged heel raises with a towel beneath the toes, every other day for three months. Each repetition took three seconds up, two seconds holding at the top and three seconds down. [2]
- Weeks 1–2: three sets of 12 repetitions at 12-repetition maximum.
- Weeks 3–4: four sets of 10 repetitions at 10-repetition maximum.
- Weeks 5–12: five sets of eight repetitions at eight-repetition maximum.
A repetition maximum means a load allowing that number of repetitions, rather than an easy set stopped at that number. Resistance increased as the repetition target decreased, using a backpack with books; further weight was added as strength improved. [2]
This is a description of the research schedule, not an instruction to add weight regardless of symptoms. Rest between sets sufficiently to regain control of the movement. A clinician can help decide whether this approach and its loading demands are appropriate for you.
How much pain and effort are acceptable?
Pain and effort are different. A hard-working calf and a sore heel are not the same sensation.
My clinical monitoring guide is pain no higher than 3/10 and effort around 7/10, with controlled technique. I also consider the response afterwards and the following morning.
Those numbers are my clinical guidance, not thresholds validated by the Rathleff trial or a guarantee that an exercise is suitable. Working at around 7/10 effort is not necessarily repetition-maximum loading.
For that reason, I describe my approach as based on the Rathleff protocol, adapted to individual tolerance.
If pain builds, your movement changes or your usual symptoms are noticeably worse the next morning, reduce the demand and reassess. Do not automatically add load or move to the next stage because the calendar says it is time. Stop and seek advice for new, sharp or unusual pain.
Do I need a Fasciitis Fighter?
You do not need to buy a branded device to reproduce the towel setup used in the research. The study tested an exercise programme using a towel; it did not establish that the Fasciitis Fighter works better than a towel. [1, 2]
I use the Fasciitis Fighter in clinic because I value a consistent, repeatable setup. A rolled towel offers flexibility in height and firmness. My choice depends on the patient, including how comfortably their big-toe joint moves.
In someone with hallux limitus or hallux rigidus—a restricted or stiff big-toe joint—I would assess whether toe elevation is appropriate and adapt the setup where needed. A fixed-height device will not suit every foot.
For my experience of using the device, its durability and how it compares with a towel, read Fasciitis Fighter Review: Why I Use It in Clinic—and Do You Need One?. The review contains an Amazon affiliate link.
When should I get advice?
Seek an assessment if you are unsure of the diagnosis, cannot find a manageable starting exercise, develop different symptoms or are not making meaningful progress. You do not need to wait until you have completed a three-month programme to ask for help.
NHS guidance recommends assessment if pain is severe, worsening, limiting normal activities or has not improved after two weeks of self-care. Seek advice for tingling or loss of sensation, or if you have diabetes and foot pain. [3]
Get urgent advice through NHS 111 for severe heel pain after an injury, inability to walk, a changed foot shape or a snap or pop at the time of injury. Outside the UK, use your local urgent-care service. [4]
The aim is a programme you can perform consistently and progress appropriately, alongside managing the demands of everyday activity.
For the wider picture, explore our guides to first-step heel pain and walking with plantar fasciitis below.
Sources & further reading
[1] Rathleff et al.: High-load strength training for plantar fasciitis — randomised trial
[2] Michael Rathleff: explanation of the exercise protocol
First-step heel pain: our introductory guide
Walking with plantar fasciitis: our activity guide
Fasciitis Fighter review: my clinical experience and towel comparison (contains an affiliate link)
This is general education, not a personal diagnosis or an individual treatment plan. Read our health information disclaimer.